Transforming a kitchen into a stylish and functional space often begins with the perfect countertop, and many homeowners are discovering the remarkable versatility of microcement. I remember the moment I decided to renovate my own kitchen – the outdated surfaces and lacklustre finishes simply didn’t reflect the modern aesthetic I envisioned. Choosing microcement not only offered a seamless and contemporary look but also provided endless possibilities for colour, texture, and durability. In this guide, we will walk you through selecting the ideal shades, gathering the essential tools, preparing your workspace, and mastering application techniques to achieve a flawless finish. Additionally, you’ll learn how to customise edges for a professional touch and maintain your new countertop to keep it looking pristine for years to come. Whether you’re a DIY enthusiast or seeking to enhance your home’s elegance, creating a modern countertop with microcement is a transformative choice that combines beauty with practicality.
Selecting the Ideal Microcement Colour and Finish
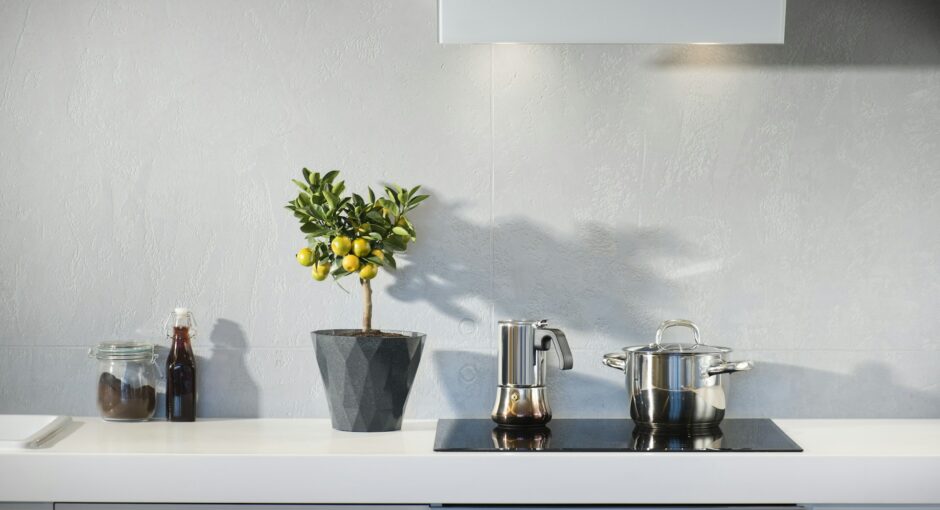
Choosing the right colour for your microcement countertop can make or break your kitchen’s aesthetic. It’s not just about picking a shade you like; it’s about ensuring it harmonises with your existing kitchen décor. Think beyond the basics and explore hues that bring character and sophistication to your space. For instance, earthy tones like slate grey or warm beige can create a timeless look, while bold colours such as navy blue or charcoal can add a contemporary edge.
When it comes to finishes, the options are diverse and can significantly impact the overall feel of your kitchen. Consider the following finishes:
- Matte: Offers a subtle, understated elegance that hides fingerprints and minor imperfections.
- Glossy: Provides a sleek, modern shine that enhances light reflection, making the space appear larger.
- Textured: Adds depth and interest, giving your countertop a unique, tactile quality.
Trending colour palettes this year include monochromatic schemes with varying shades of the same colour, as well as bold contrasts that make a statement. Additionally, consider how light interacts with your chosen colour and finish. A lighter microcement can make a cramped kitchen feel more spacious, while darker tones can create a cosy, intimate atmosphere. Balancing light reflection and space perception is key to achieving a modern and functional kitchen countertop.
Essential Tools and Materials for Microcement Installation
Embarking on a microcement project demands the right arsenal to ensure a flawless finish. Start with high-quality mixing tools to achieve the perfect consistency, crucial for a seamless application. Trowels are your best friends here, allowing for precise spreading and smoothing of the microcement layers. Don’t overlook the importance of primers; they create a strong bond between the substrate and the microcement, preventing future cracks and ensuring durability.
To safeguard your investment, sealants are indispensable. They protect the surface from stains and moisture, maintaining the countertop’s pristine appearance over time. Below is a handy table summarising each essential tool and material along with its purpose:
|
Item |
Purpose |
|
Mixing Tools |
Ensure uniform consistency of the microcement mixture. |
|
Trowels |
Facilitate precise application and smoothing of microcement layers. |
|
Primers |
Create a strong bond between the substrate and microcement to prevent cracking. |
|
Sealants |
Protect the finished surface from stains, moisture, and wear. |
Equipping yourself with these essential tools and materials not only streamlines the installation process but also guarantees a stunning, resilient modern countertop that stands the test of time.
Essential Steps to Prepare Your Workspace for Microcement Countertop Installation
Transforming your kitchen with a microcement countertop starts long before the first layer is applied. Achieving a flawless finish hinges on meticulous surface preparation. Begin by thoroughly cleaning the existing countertop to remove grease, grime, and any residues that could hinder adhesion. Utilize a high-quality degreaser and ensure every nook and cranny is spotless.
Once cleaned, proceed to sanding the surface. This step is crucial for creating a level and dust-free base, promoting optimal adhesion of the microcement. Use medium-grit sandpaper to smooth out imperfections and achieve an even texture. After sanding, apply a suitable primer to further enhance bonding. The primer not only seals the surface but also ensures that the microcement adheres seamlessly, preventing future issues like peeling or cracking.
|
Countertop Surface |
Cleaning Method |
Sanding Grit |
Recommended Primer |
|
Granite |
Mineral-based cleaner |
120-grit |
Epoxy Primer |
|
Laminate |
Detergent and water |
150-grit |
Acrylic Primer |
|
Existing Microcement |
Alcohol-based cleaner |
180-grit |
Polyurethane Primer |
By adhering to these preparation techniques, you’ll set the stage for a stunning and durable microcement countertop that not only elevates your kitchen’s aesthetic but also stands the test of time. Remember, the key to a successful application lies in the details—don’t rush the prep work!
Layering and Application Techniques for a Seamless Finish
Achieving a flawless microcement countertop requires meticulous layering and precise application techniques. Start by preparing the surface with a base coat that ensures proper adhesion. This foundational layer is crucial for the durability and longevity of the countertop.
- Base Coat Application: Spread a thin, even layer of microcement to create a stable foundation. Use a trowel to maintain uniform thickness and eliminate any air pockets.
- Reinforcing Mesh Installation: Once the base coat is slightly tacky, embed a reinforcing mesh to prevent cracks and enhance structural integrity. Carefully press the mesh into the base coat to ensure it is fully integrated.
- Topcoat Application: Apply the final layer of microcement, smoothing it out with a trowel for a seamless finish. This layer not only provides the desired aesthetic but also adds an extra layer of protection against wear and tear.
To maintain a uniform thickness, work consistently and monitor each layer closely. Preventing cracks involves allowing sufficient drying time between layers and ensuring each layer is applied evenly. These techniques collectively contribute to a modern, sleek countertop that stands the test of time.
Upgrade your space with microcement! Discover more at https://www.festfloor.com/
Customising Edges and Corners for a Professional Appearance
Achieving a seamless finish on your microcement countertop hinges on how you handle the edges and corners. One popular method involves using masking tape to create clean, straight lines. This technique is straightforward and cost-effective, allowing for precise control during the application process. Alternatively, specialised edging tools can be employed to mould curves and angles with greater ease, especially in complex kitchen layouts.
Maintaining sharp lines is crucial to avoid a sloppy appearance. When using masking tape, ensure it’s firmly pressed down to prevent any microcement seepage. For those opting for edging tools, practicing on scrap material can help familiarise yourself with their handling, reducing the risk of common mistakes like uneven edges or unintended overlaps. Consistency is key, so take your time to meticulously plan each section before application.
|
Method |
Advantages |
Disadvantages |
Best For |
|
Masking Tape |
Cost-effective, easy to apply, great for straight lines |
Time-consuming for complex shapes, possible seepage if not sealed properly |
Simple, straight-edged countertops |
|
Specialised Edging Tools |
Efficient for curves and intricate designs, consistent results |
Higher initial investment, requires practice to master |
Custom shapes and high-end finishes |
Maintenance and Care Tips to Preserve Your Microcement Countertop
Keeping your microcement countertop in pristine condition doesn’t have to be a daunting task. Incorporate a simple daily cleaning routine by wiping surfaces with a soft, damp cloth to remove spills and prevent staining. Avoid abrasive cleaners; instead, opt for pH-neutral products that maintain the integrity of the microcement finish.
Regular periodic sealing is essential to enhance the durability and appearance of your countertop. Aim to reseal every 12 to 18 months, depending on usage, to protect against moisture and wear. Additionally, establish a monthly maintenance checklist that includes inspecting for cracks or chips and addressing them promptly to extend the lifespan of your investment.
Embracing these maintenance practices not only preserves the aesthetic appeal of your microcement surface but also ensures it remains a functional and stylish centerpiece in your kitchen for years to come. By prioritizing care and attention, you can enjoy the seamless beauty of microcement without the worry of daily wear and tear.